I have so many old photos of projects that I’ve worked done, parts I’ve made, and some races I’ve attended. I thought it may be interesting to share some of this stuff, in what I’ll call: The Archive.
One of these projects was making a 5-link rear suspension for my X-Factory X6 Cubed (X6^3). In 2013 I was “sponsored” by X-Factory (in quotes, because it was one of those “contracted customer” situations) and I was allowed access to their private forum. This was a place for team drivers to chat, share setups, and get inside information on new X-Factory projects. Brian Kinwald posted so much on there and he shared all of the details about his cars, the crazy parts he would make, and the setups he developed. All of the team guys were tinkerers and shared what they were up to and I felt right at home in this environment.
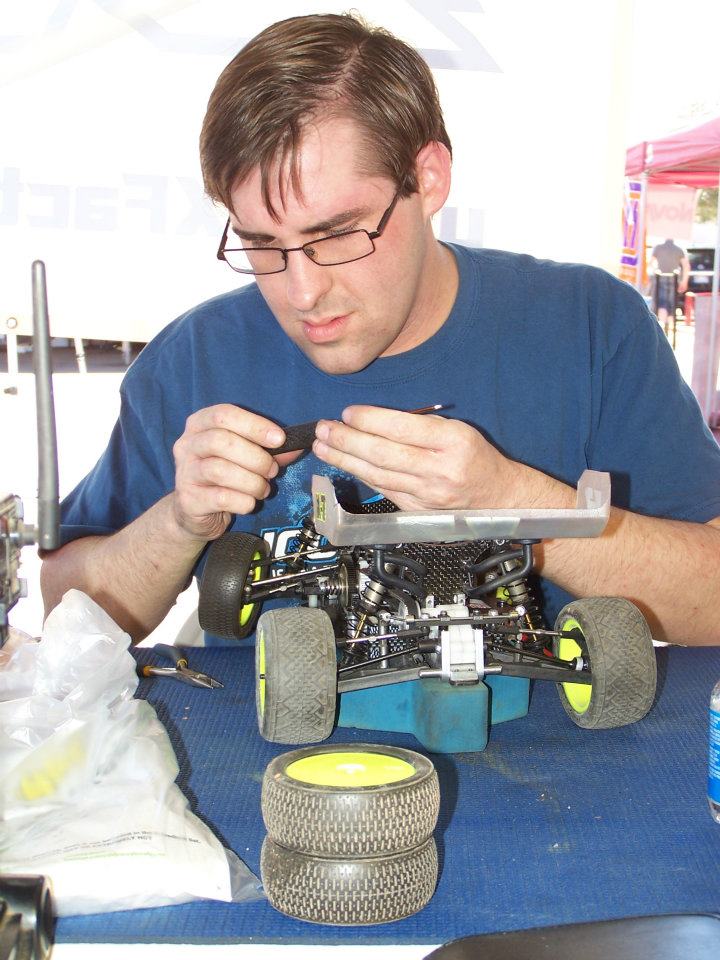
Paul Sinclair, part-owner and lead engineer/designer at X-Factory. Here he is working on his prototype four-wheel-drive buggy. Unfortunately, this car was never released which is a shame because it was a unique design that used the inertia of the motor and the drivetrain to manipulate weight transfer and therefore traction.
Brian Kinwalds X6 Squared, what an awesome looking car! Lots of little tweaks and modifications done to this one. The X6^2 is my favorite R/C car that I never owned. I see on their website that they still have two kits in stock, maybe I’ll get one for nostalgia’s sake.
One of my favorite team drivers was Bruno ‘Elvo’ Heremans. He was the European version of Kinwald. He developed several mid-motor buggies before joining X-Factory and won a lot of big races in Europe. He created the web site: RC Car Handling: An Introduction to vehicle dynamics, which I read religiously. That website is a great resource for anyone interested in learning how to setup an R/C car.
On the X-Factory forums, Elvo always shared with the team what he was up to with his cars. He was always modifying his cars to experiment with weight distribution, suspension geometry, or test parts from other cars. An interesting experiment he did was converting the rear of his B4 to 5-Link suspension.
Unfortunately, he only shared this one photo. It looks like he used G10 fiberglass to make the brackets attached to the side of the chassis and the side links are made from tie-rods. I thought this was so cool but he wasn’t the first to use this type of suspension on a 2wd buggy.
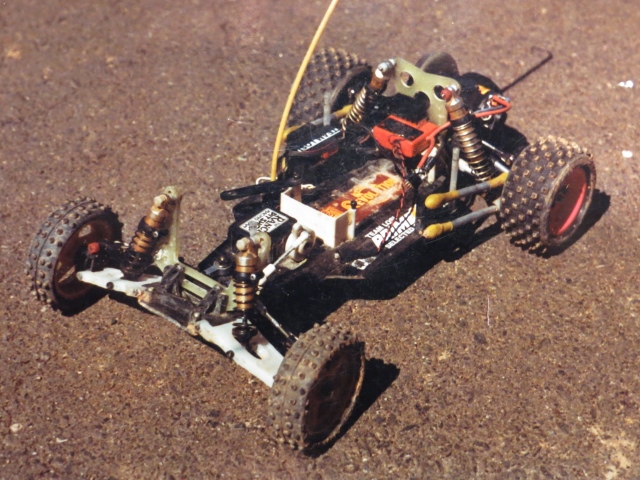
Multi-link suspension has been around in R/C since the late 1980s. It was originally used on Team Losi’s first 2wd buggy, the JRX-2. In an interview on The No Name RC Podcast, Gil Losi Jr talks about this car and its unique suspension design.
A beautifully restored or preserved JRX-2. The cars back then just looked cooler with the brightly colored decals, orange electronics, and red and blue motor wires – IMO the cars of today have gotten too clean.
To the best of my knowledge, the JRX-2 was the only ‘Race Car’ to feature this type of suspension and it’s successor, the JRX Pro, was a return to conventional lower H-arms with upper camber links.
On the forums, Elvo praised the JRX-2 and its rear suspension. The tracks he raced on in Europe featured multiple surfaces with varying levels of traction, small jumps, and lots of little bumps to upset the car. Perfect for this type of suspension where the anti-squat is dynamic and the car develops a lot of rear traction.
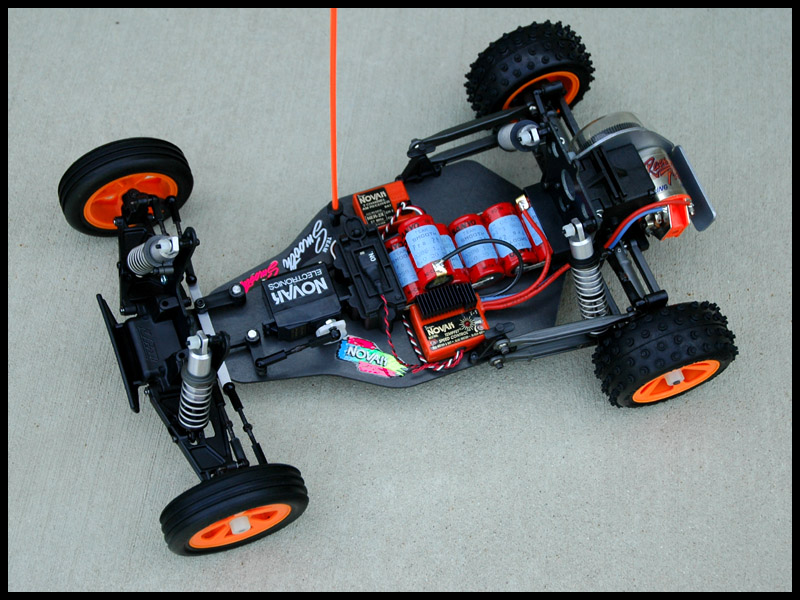
Bruno later converted his X-Factory X6^2 to 5-Link rear suspension. About the handling, he had this to say: “Performance is great. Lots of grip. And it’s a reliable kind of grip. Feels very nice especially when the track is made out of different materials – like cobblestone patches. First couple of batteries I was on the same pace as with my regular X-6.”
Again, he only posted these photos and no details of how the links connected to the hubs. He did mention that the way the upper side links angled toward the middle of the chassis wasn’t ideal. I thought this looked like a really fun project and wanted to make my own. Notice the tires, very different to the tires you’ll see on my car which is some indication to the difference in tracks we drive on.
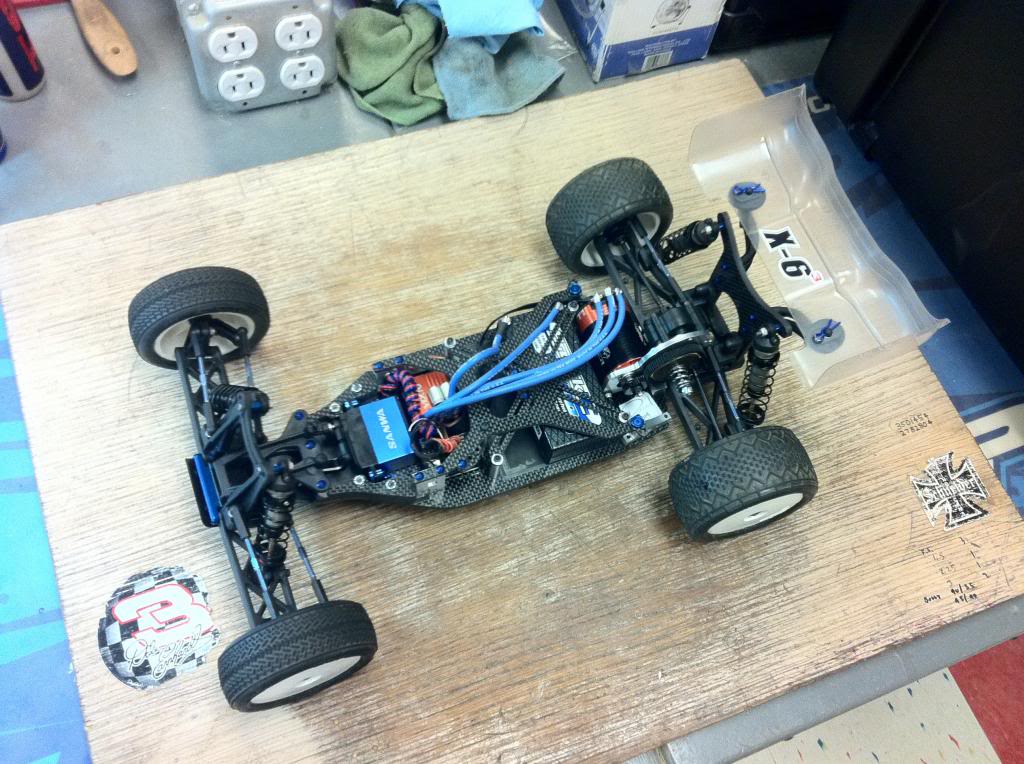
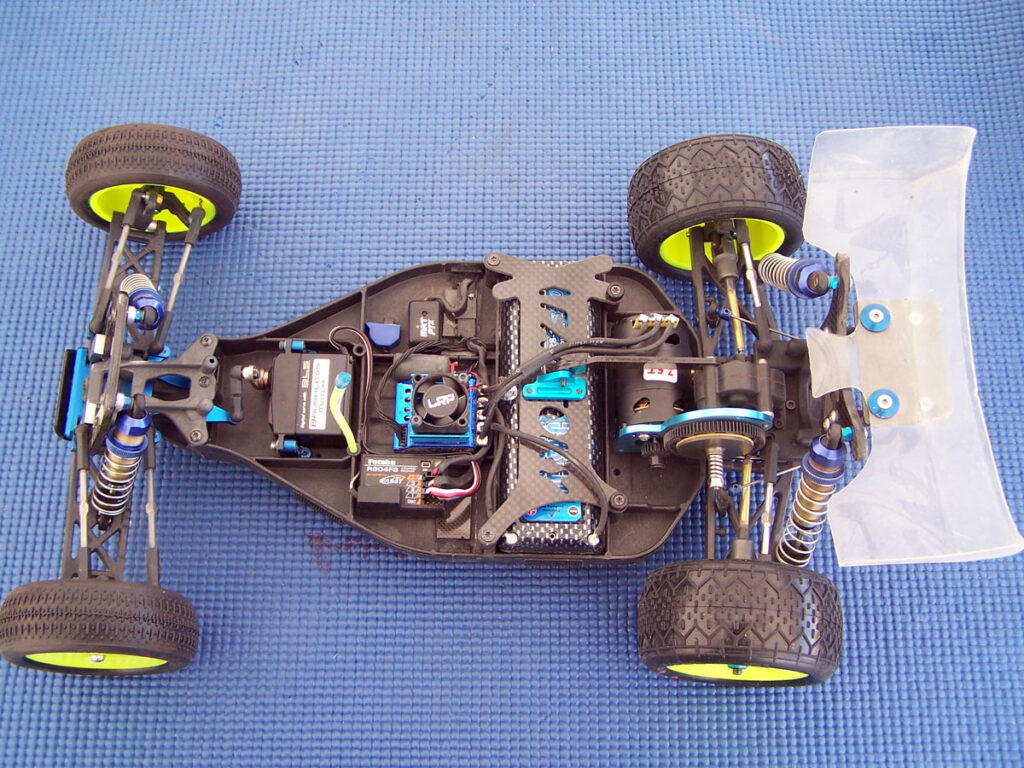
Here is my X6^3 when I first got it done – I can tell because of that $100 Sanwa servo that broke the first time I ran the car. I thought that X-Factory was really cool because they were a small company and one of the first to make mid-motor buggies for U.S. tracks. The little white sticker near the pinion gear is the number of that chassis, I think mine was 14 or 15, and Paul signed it. Clay tires on the car, probably going to Air-Land Hobbies in Hemet, CA.
Edit: The red and white checker floor, that has to be at the track in Redlands, CA. I had the single lap track record for 17.5 buggy on one of their layouts.
The JR-X6^3!
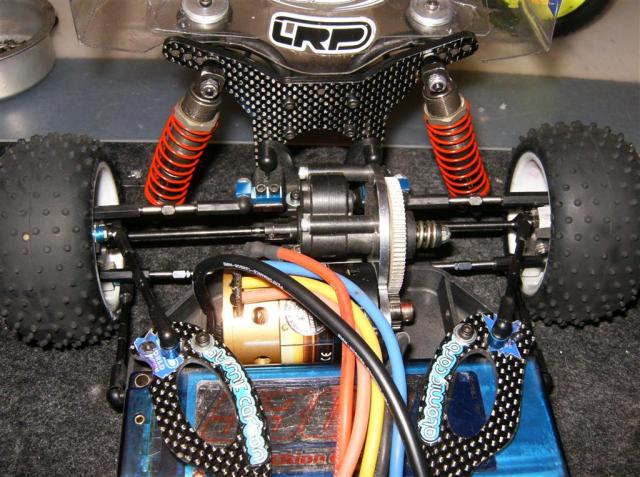
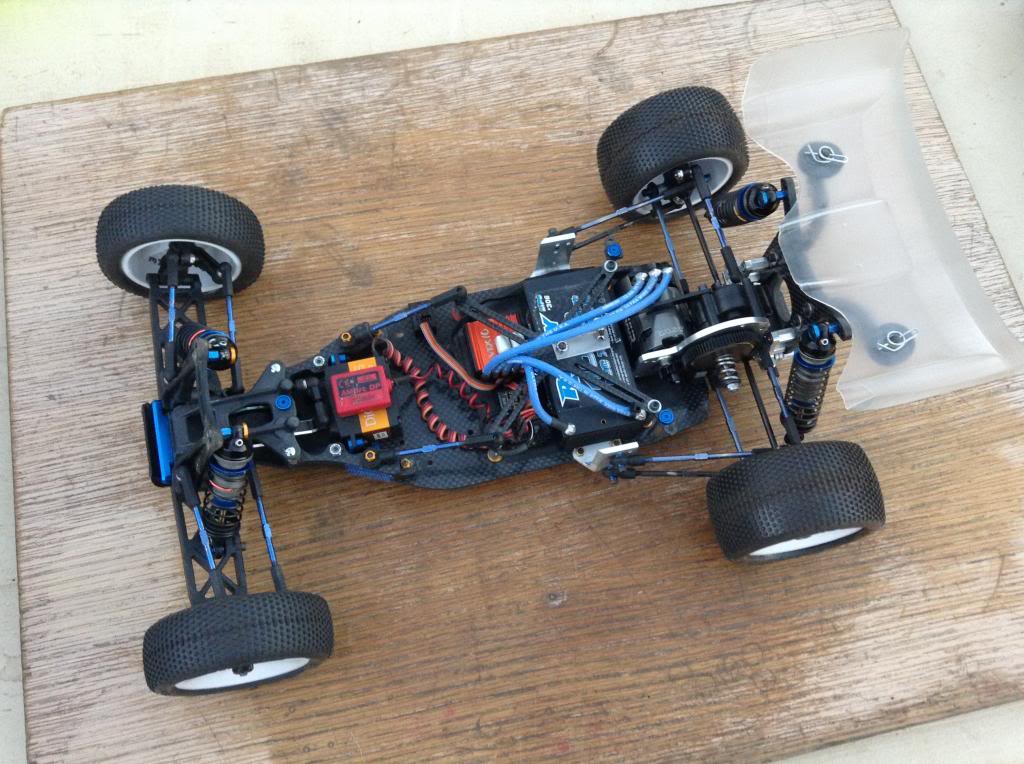
Before I get to the 5-Link conversion, you can see some of the other changes I made to the car when I ran the stock rear end. I switched to a 13.5 Schuur Speed motor to race in super-stock. The upper X-brace is removed to let the car flex more and I milled the chassis to move the battery, ESC, and receiver closer to the rear. I switched to the first generation big bore shocks from Associated, those really sucked – they always leaked oil. Now, Holeshot tires front and rear – I took these photos before my first runs with the 5-Link at Palm Desert R/C Raceway.
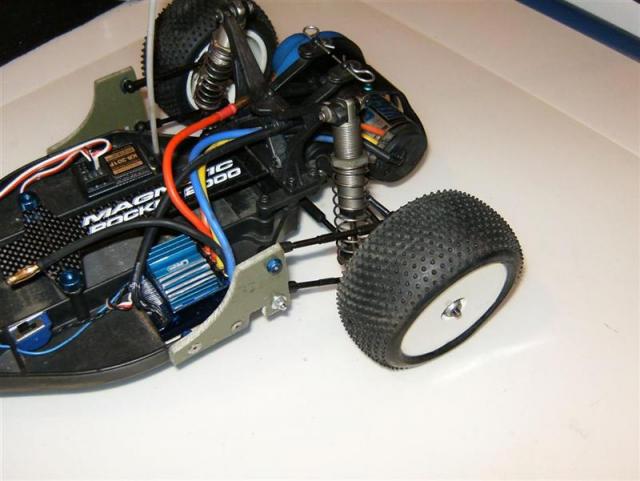
I remember I was going to my local hobby shop every weekend, buying more ballstuds, shock ends, tie-rods, and whatever else I needed. The last thing to figure out was how to mount the shocks. I found a set of Traxxas sway bar links that worked perfectly – the ball end snapped perfectly into the AE shock end and slid nicely onto the shank of a tie-rod. To change the lower shock position, just loosen the set screw and move the shock end side to side.
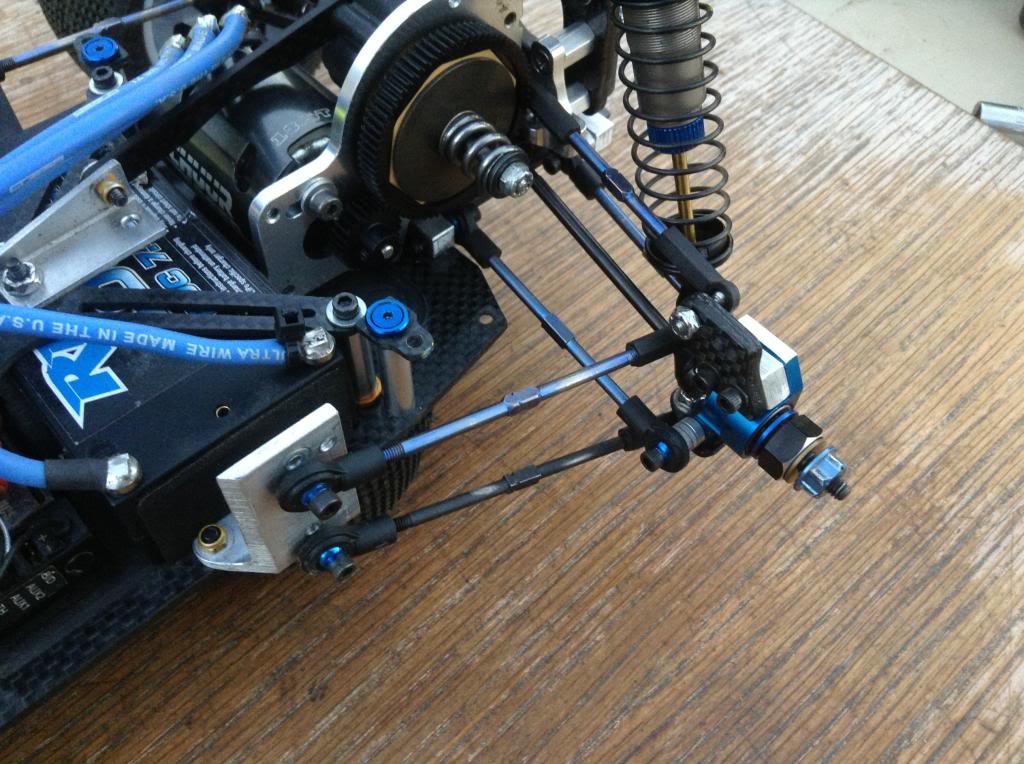
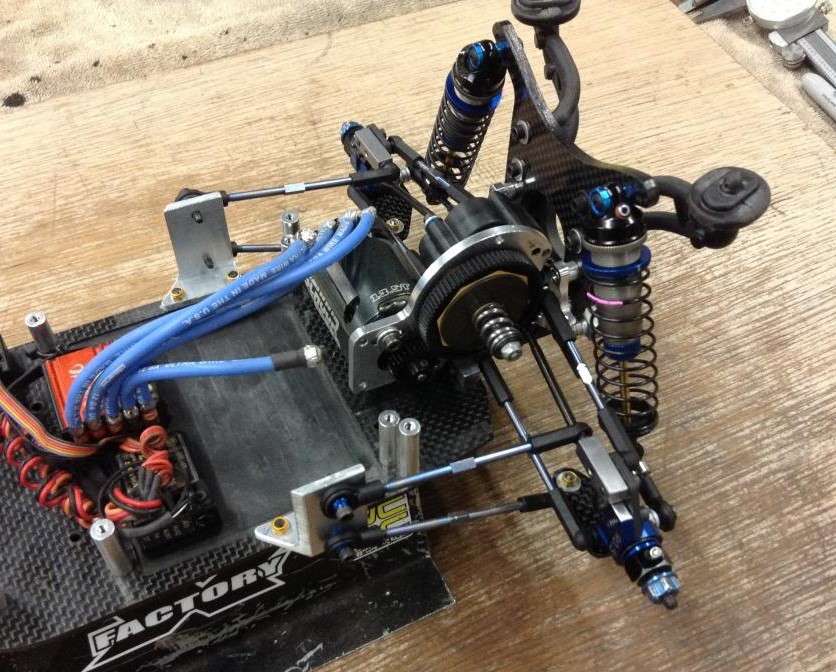
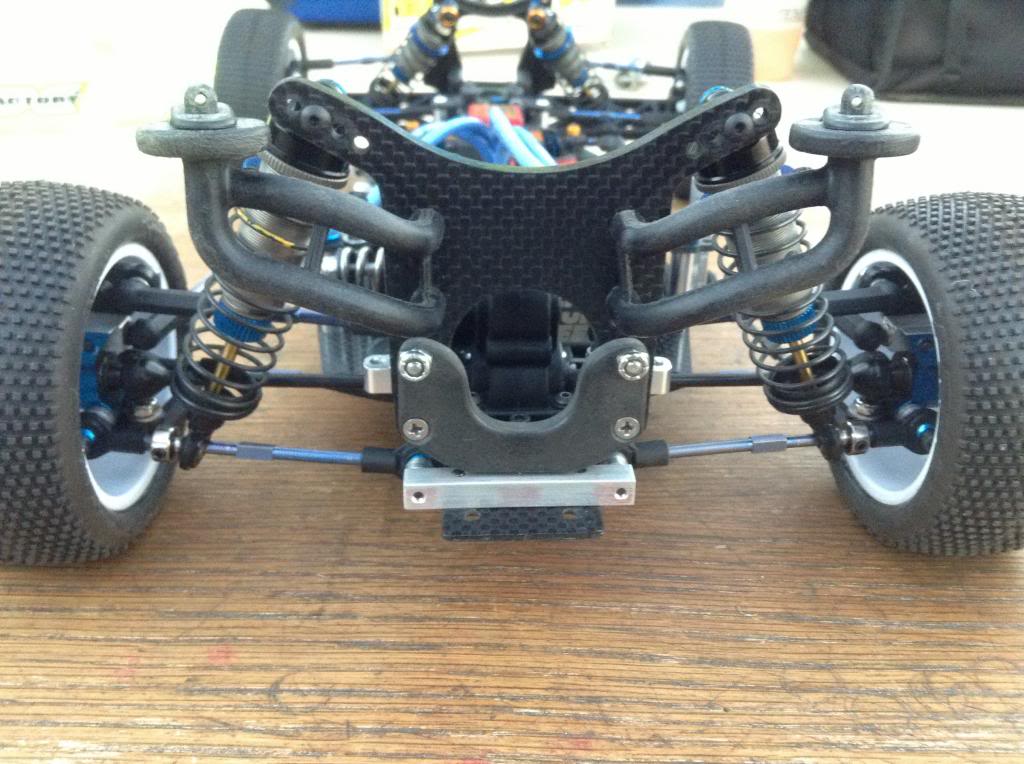
You can see here my brackets to mount the side links. I made those out of scrap chunks of aluminum angle. It took a little guesswork to find the mounting locations. Elvo thought that equal lower and side link lengths would be ideal, so that’s how I made mine. The upper “camber link” is basically stock.
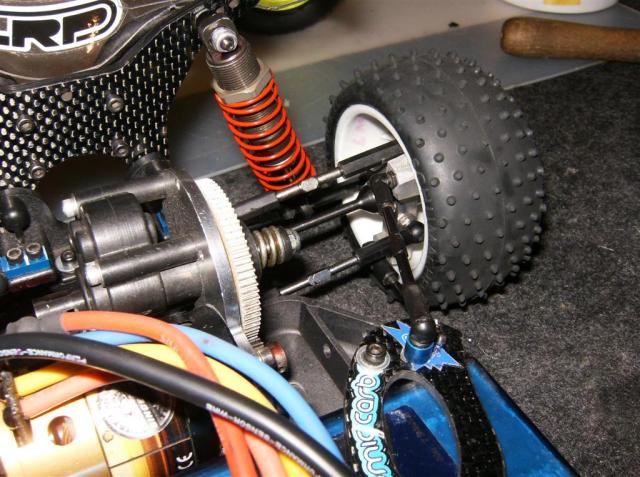
The Associated rear hubs worked great for this. I was able to use 1/4″ aluminum key stock to make those little pieces that sandwich between the carbon plate and the hub. That was where the upper side link attached to the hub. On the inboard side, I also used key stock to make the “inner pivots” with the front being slightly narrower than the rear. That, coupled with the length of the lower links and angle built into the hub meant the rear tires were toed-in three degrees at ride height. I used shock ends instead of ballstuds where ever I could to avoid so many chances of a ball cup popping off.
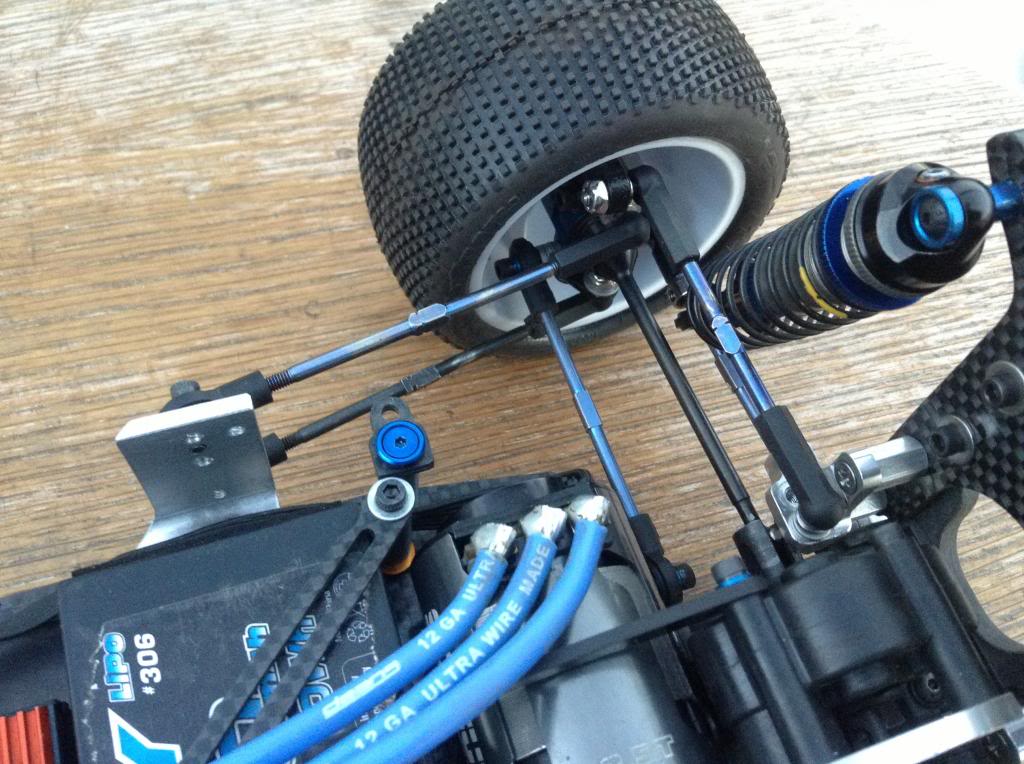
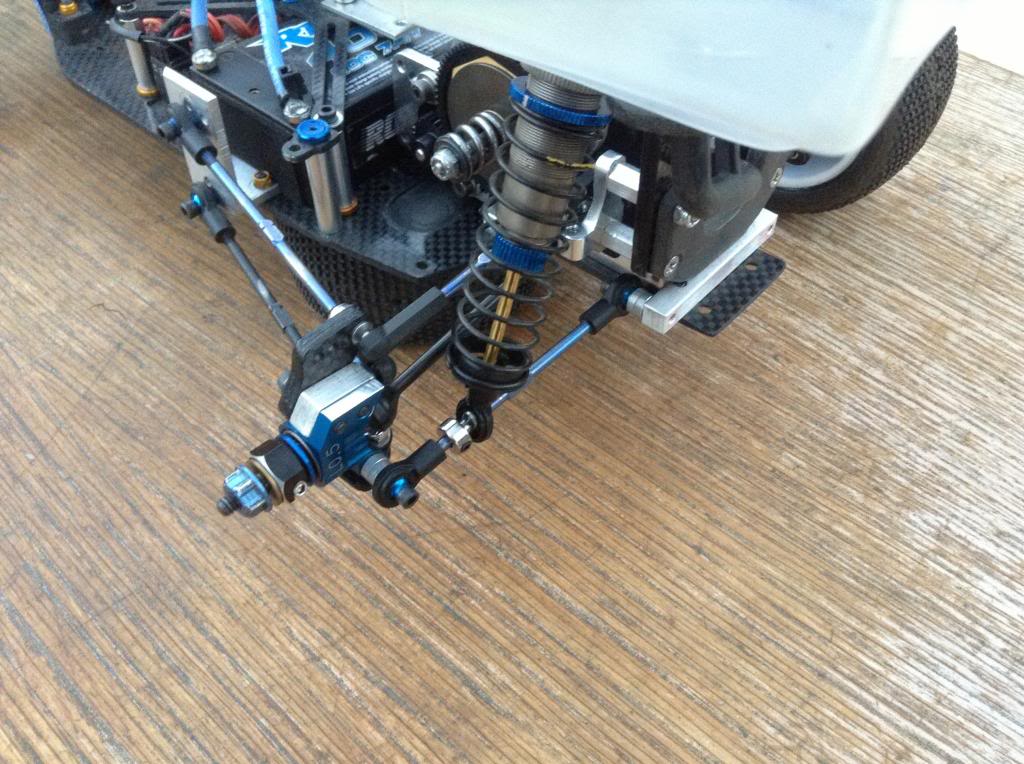
For the attachment of the lower side links to the rear hubs, I used little bits of carbon I cut from an old battery strap. I drilled and tapped the hubs for m3 screws to fix the carbon plates. I made all of these little parts with a band saw, drill press, and a Dremel.
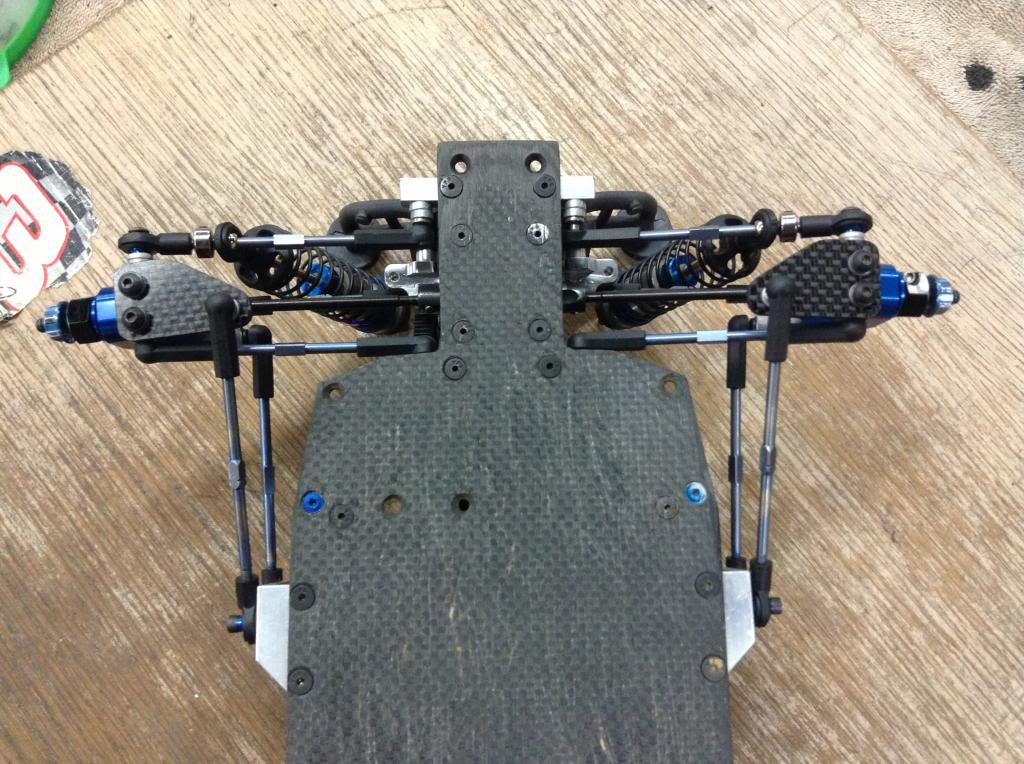
I was really happy with how this turned out. The rear links were all parallel to each other. The side links were equal length, parallel to each other, and close to perpendicular to the rear links. I wish I would have taken video of the rear tires when cycling the suspension. From full droop, to ride height, to full bump, the rear tires would camber-in a little and toe-in a little.
Performance-wise, it was ok. On the loose dirt at Palm Desert, it handled the infield well, but every few laps it would get all out of shape and randomly flip over. At Air-Land hobbies, indoor wet clay track, it was better. This track was smooth with small to medium size jumps. The 5-Link suspension was incredibly rigid compared to a traditional plastic arm and camber link that has massive flexibility. This precision made the car fast on smooth high bite clay but inconsistent and difficult to drive on loose bumpy outdoor.
Ultimately the downfall for the 5-Link was jumping. The tracks in SoCal have big jumps and this type of suspension with its decreasing-rate anti-squat wasn’t a good match. After some practice days at a few different tracks, I switched the car back to the standard suspension. I was always a bit skeptical about how it would work for me and the tracks I raced at but I couldn’t pass up a project like this. Regardless of performance, I was happy with how it turned out technically – the camber gain and toe change throughout the suspension travel was exactly what I wanted and when it was completed I felt proud. Maybe this could be tried again on an oval car? Hmm…