Making stuff is fun. It’s cool to start with an idea and then after some work, you have something. In regard to R/C – it’s awesome when you make a part and it improves the car’s performance, reliability, or aesthetics. When I’m at the track, I like to check out other cars to see what people are up to with their setups and occasionally I’ll spot some modified or homemade stuff. It’s always cool to see what people come up with.
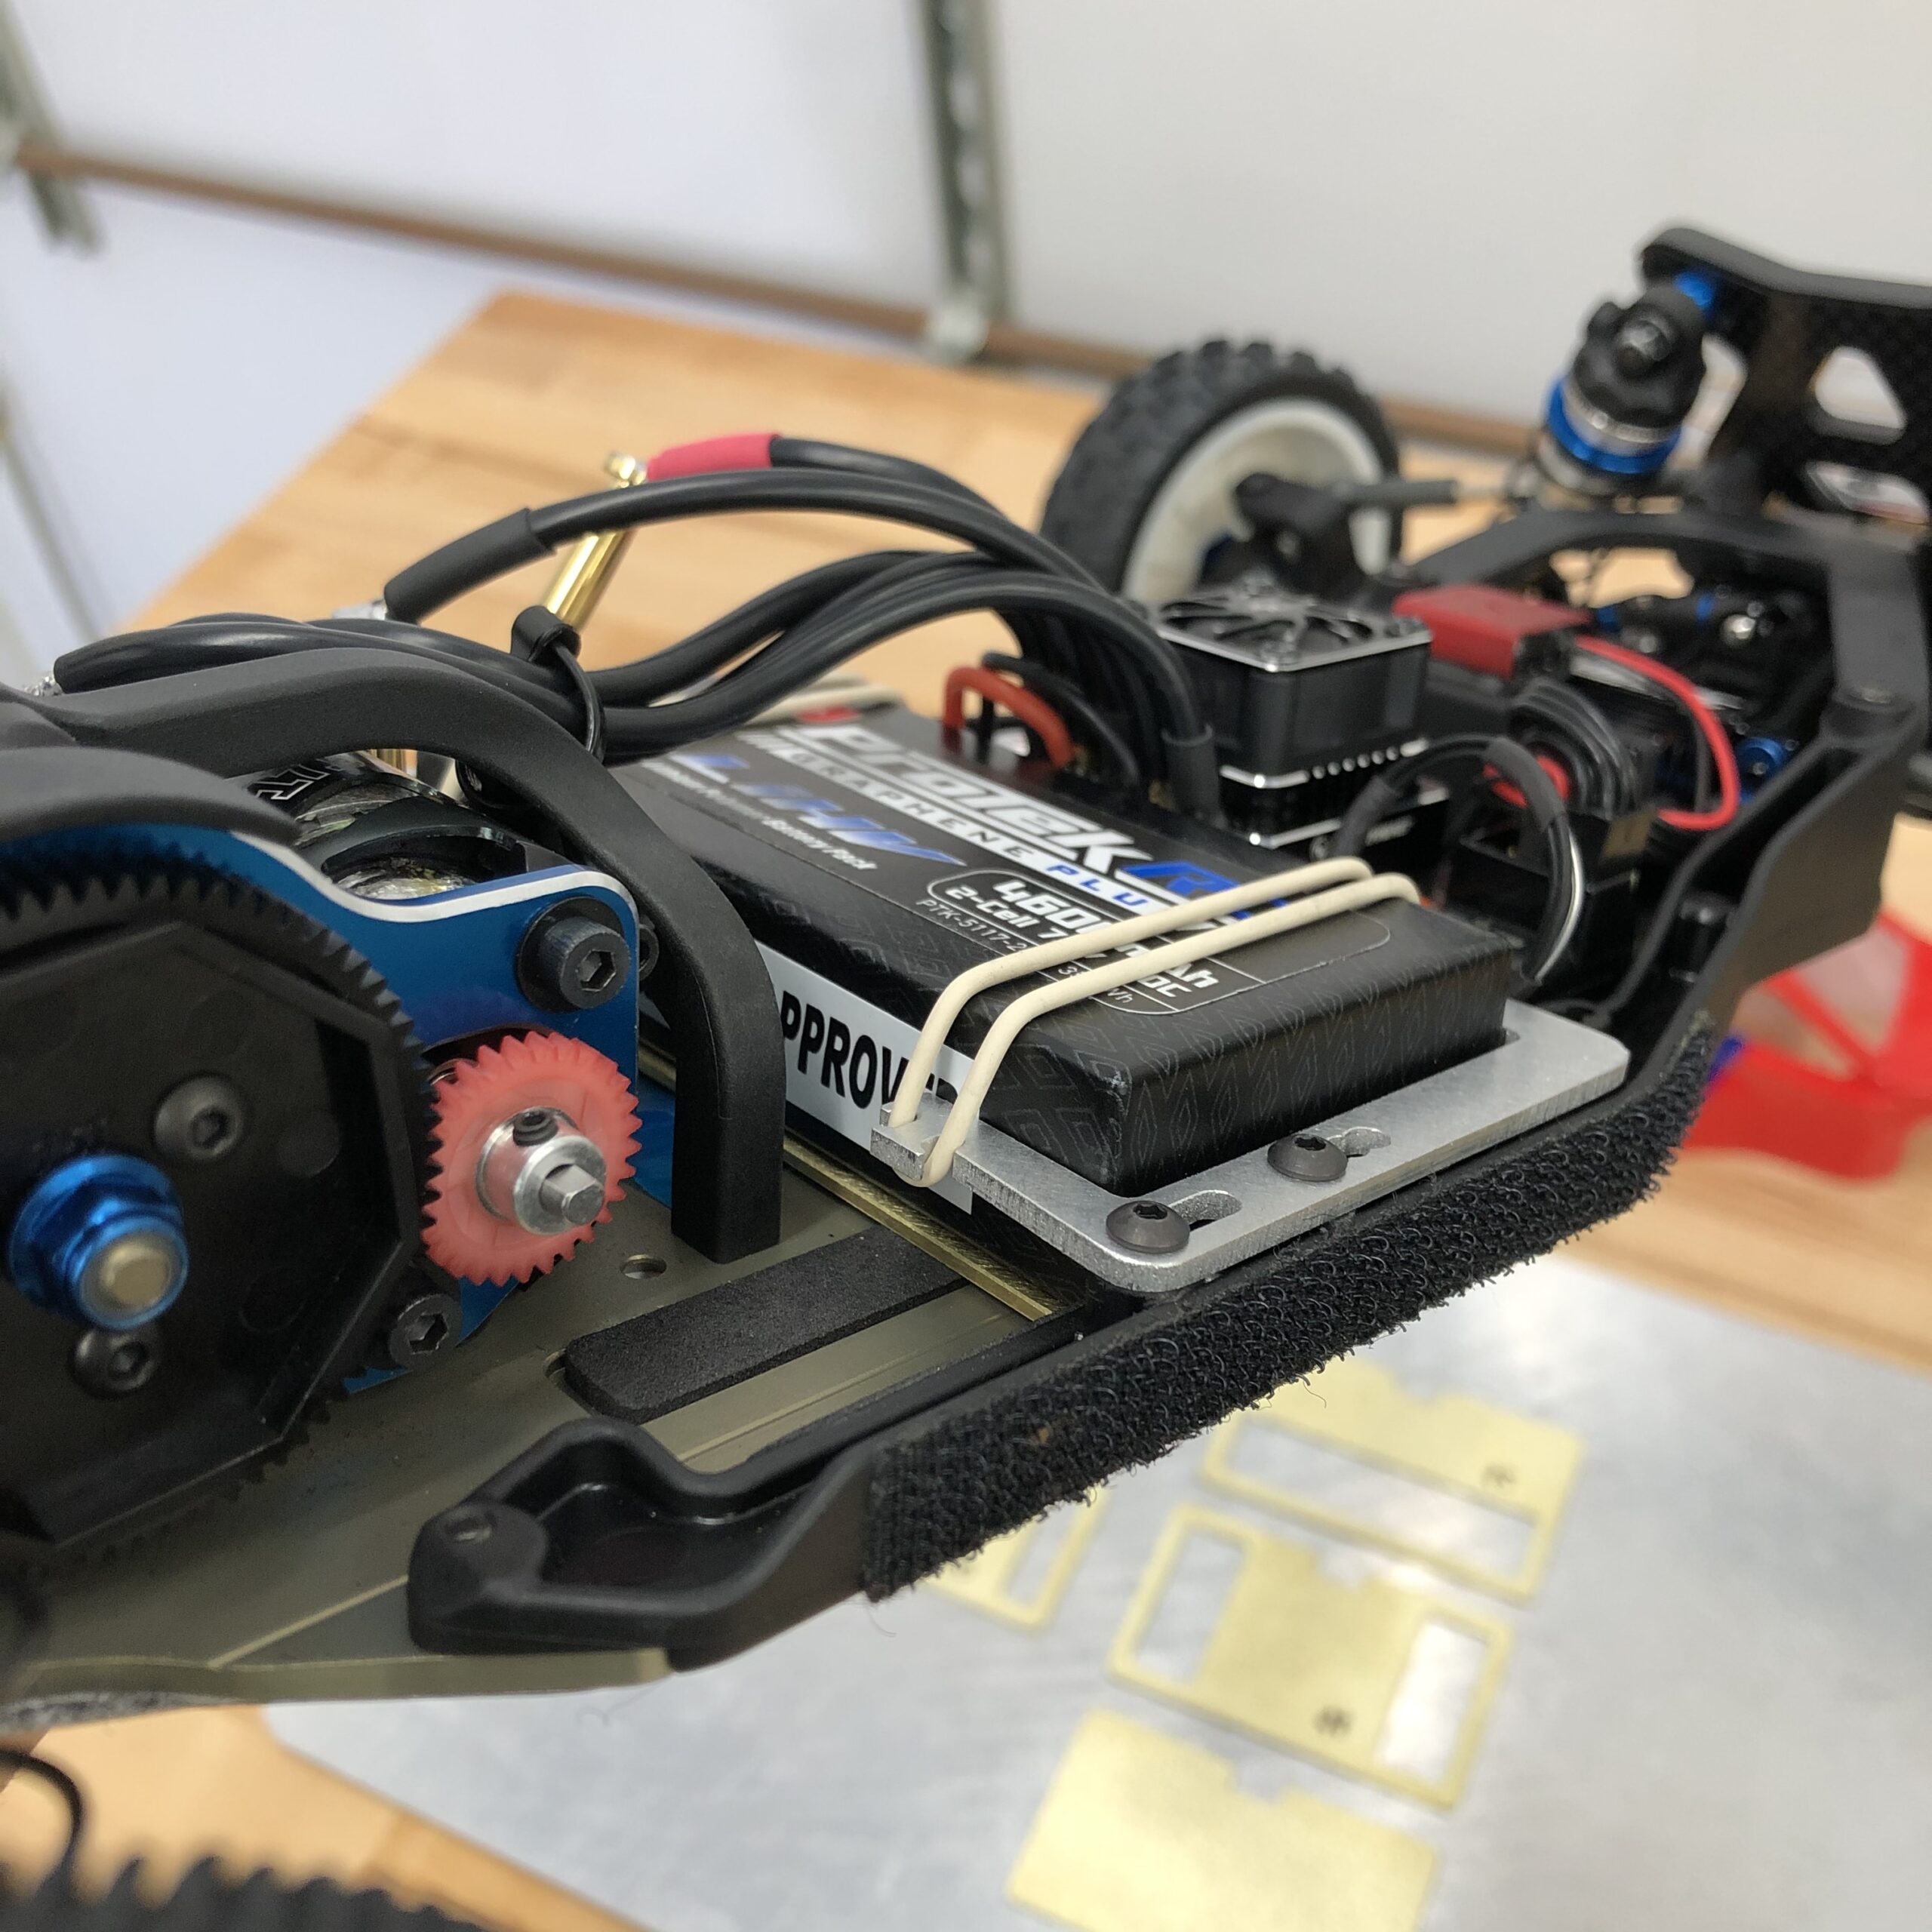
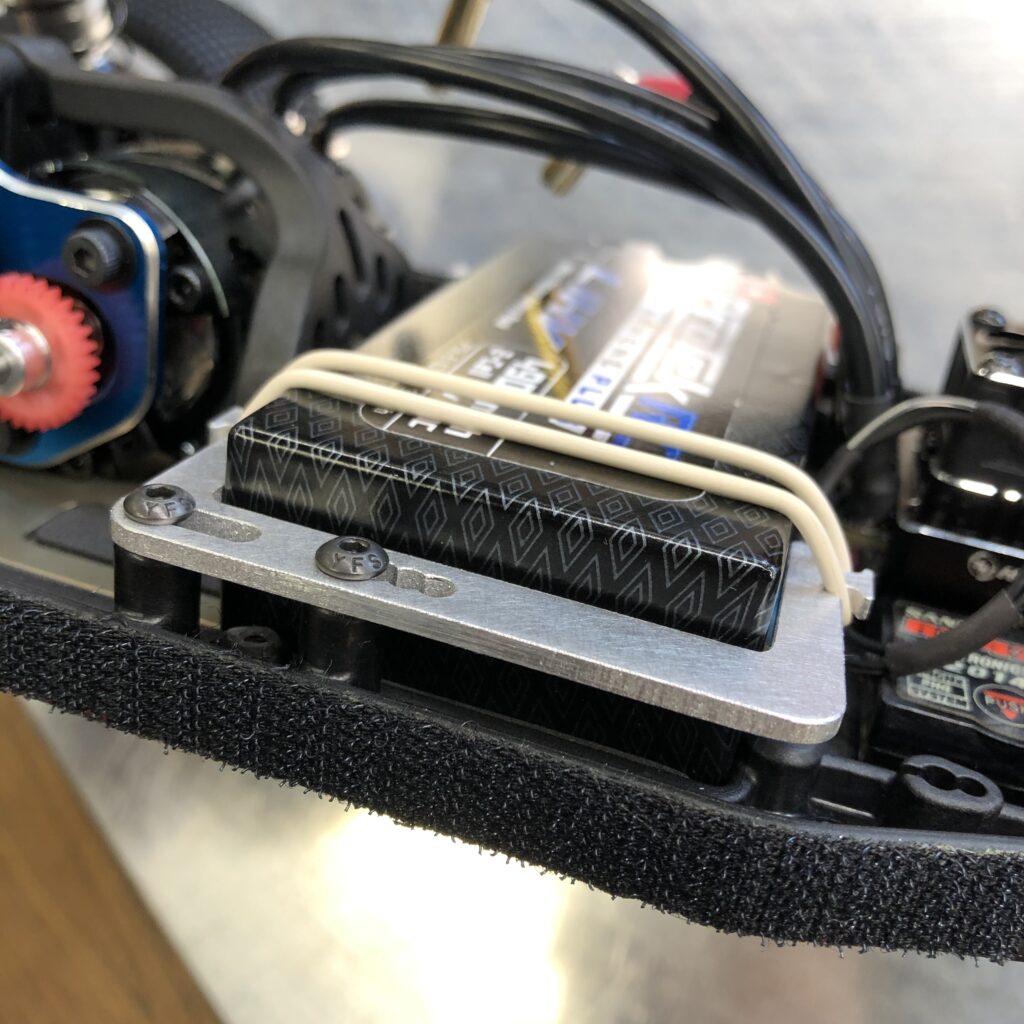
The first part I wanted to make for my B6.2 is a new battery mount. The stock one has all of the adjustability needed to fit any battery and will hold it secure, but it’s clunky. Also, I’m not a fan of how the “forward” position doesn’t get the battery all the way to the front of its space. You can see in the photo that there is about a 2mm gap between the battery and the side rail.
When I built my car I got a normal size battery pack but quickly noticed a few guys having success at the track using the low profile type. I got one but didn’t bother using it with the stock system as you have to adjust the height manually. I wanted to use o-rings to hold the pack that way switching between different battery configurations will be quick and easy. I like the way the TLR car uses two mounts on the sides of the battery so I kept that in mind.
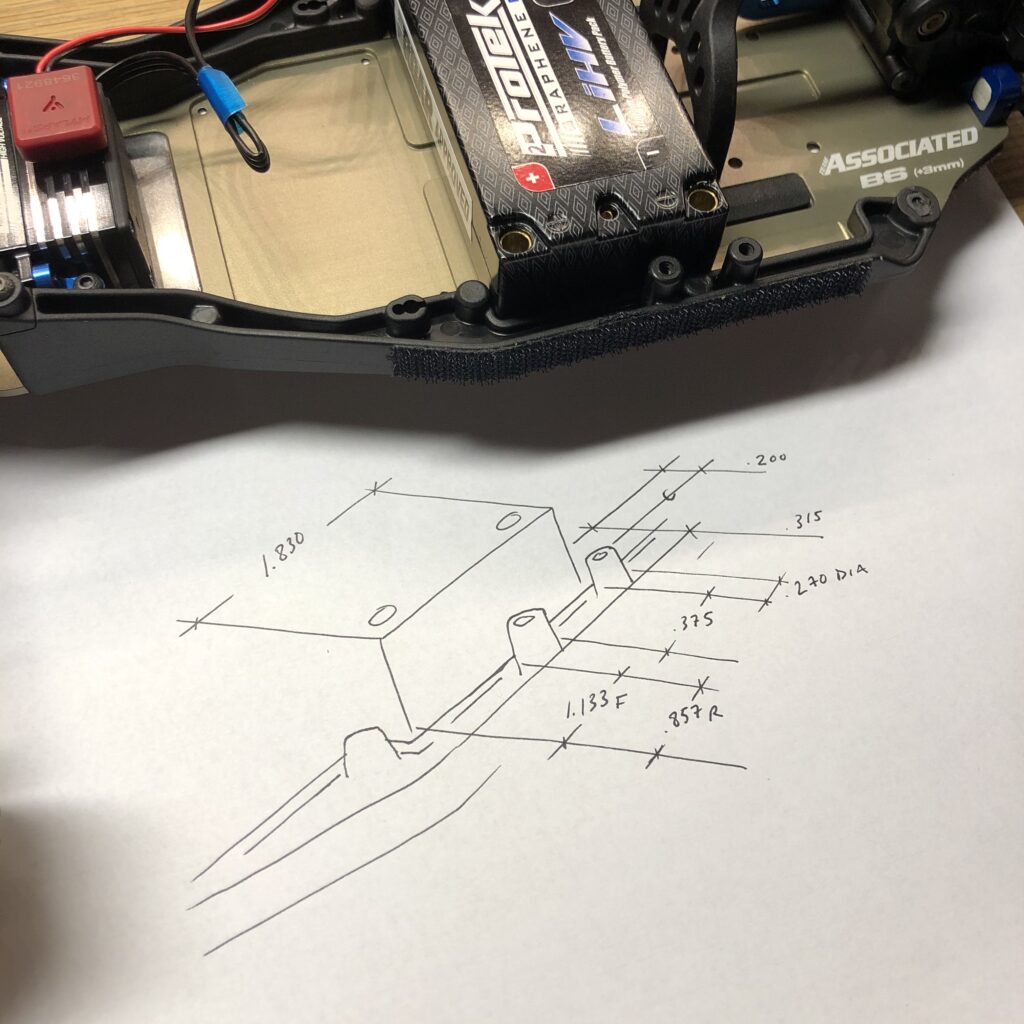
I started by taking measurements of the battery and the side rails where the mounts will attach. I indexed the holes so that the battery will sit all the way forward, all the way back, and two spots in between. I think that finer adjustment would be unnecessary.
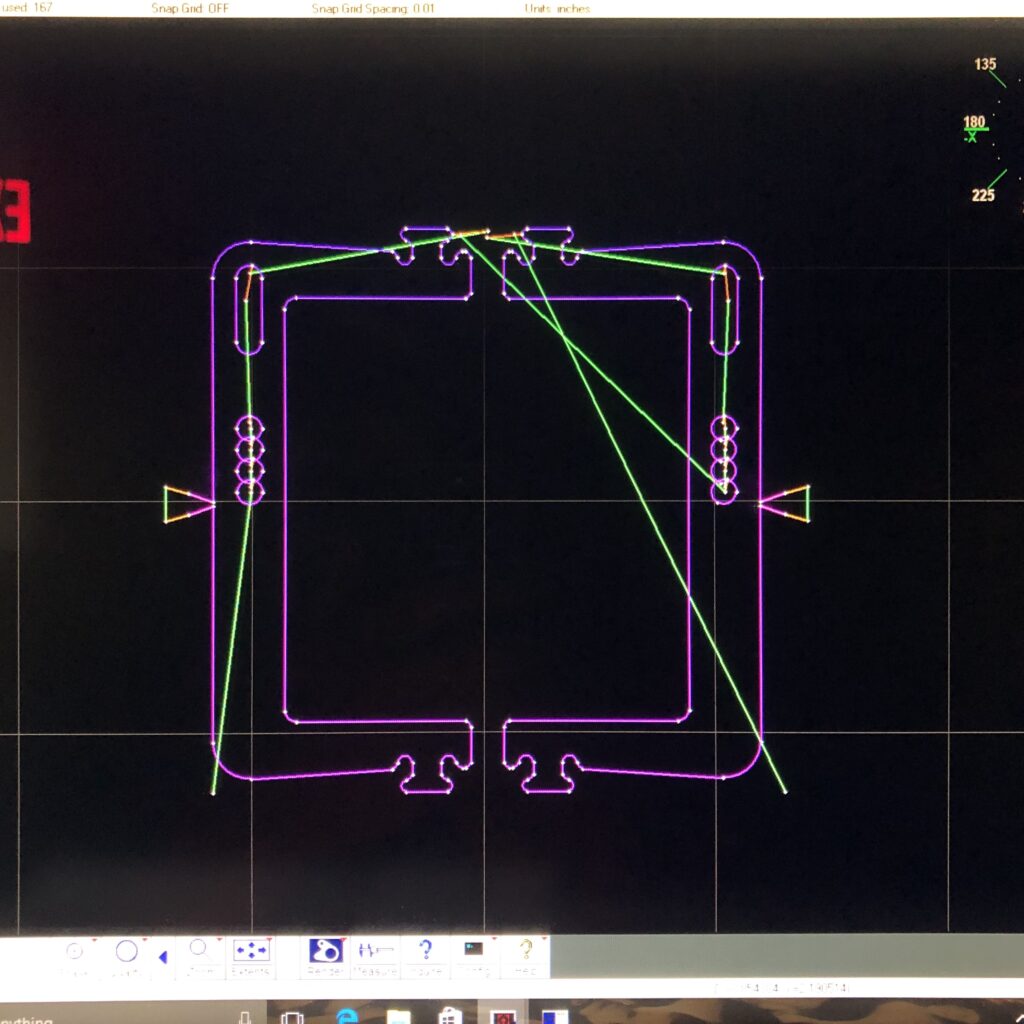
I cut these mounts out of .065″ aluminum on the waterjet. Starting with the dimensions from the hand sketch, I made a 2D line drawing in AutoCad of the mounts. From that, I made the tool path shown above. The purple lines are the edges of the parts where the cutting happens, gold is the lead-in and lead-outs (where the machine starts and stops), and the green is the traverse movements. The front set of overlapping holes locate the mount and the rear is slotted that way I didnt need them to be an exact fit to the side rails.
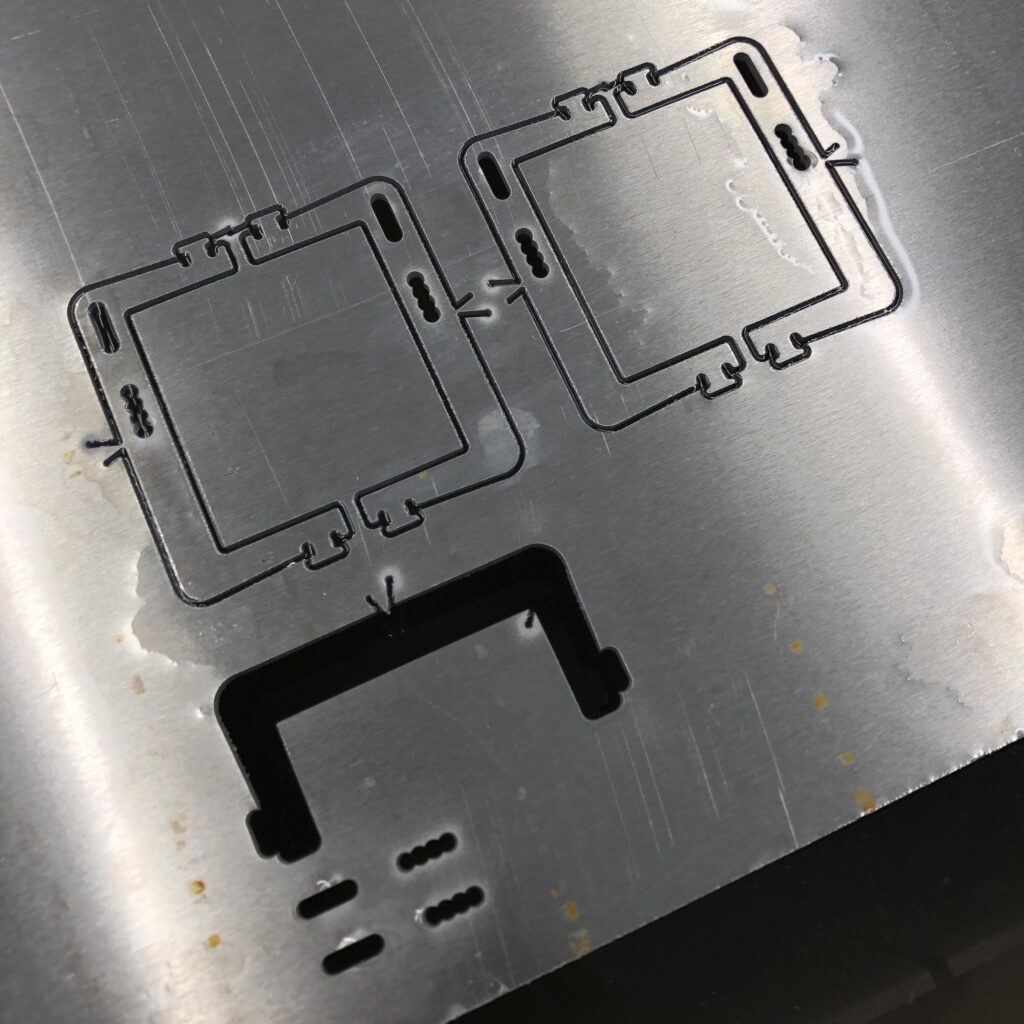
You can see the little tabs left to hold the parts in place – without those, these little parts would surely fall to the bottom of the tank. Also, the test holes and slots at the bottom are to dial-in the fitment to the 3mm screws. This takes a little trial and error as I have to correct for any wear in the cutting nozzle. The margin of error for small parts like this is tiny, fortunately, corrections can be made in as little as 0.0005″ increments!
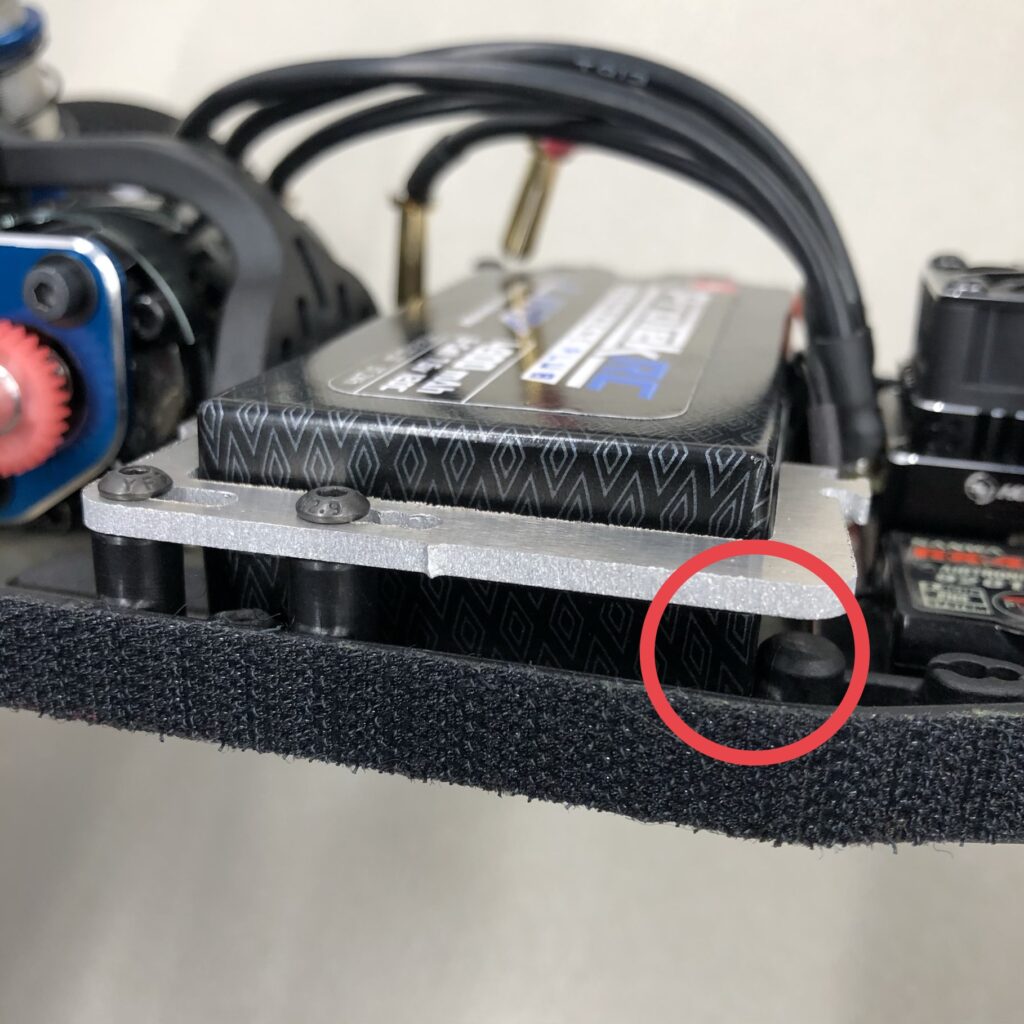
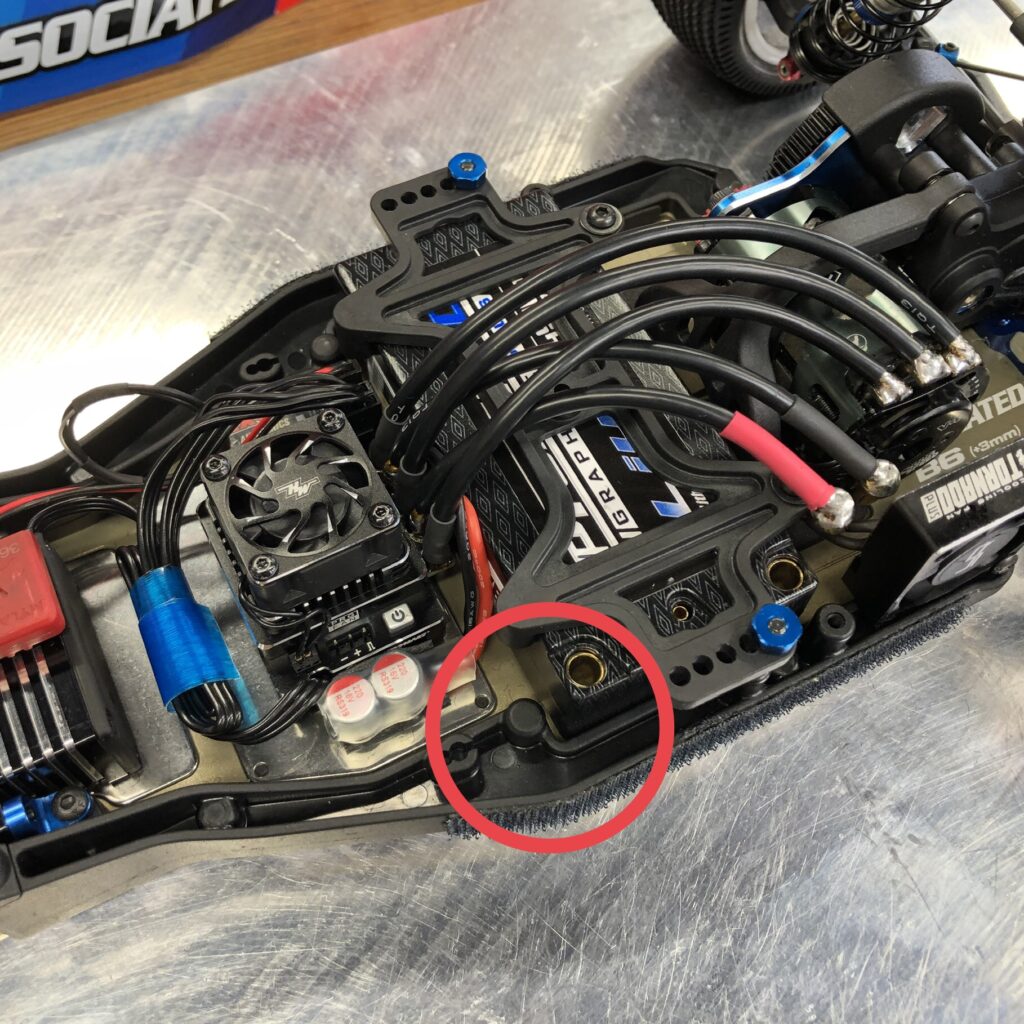
Before I spent any time cleaning up these parts, I checked the fit. Now the battery rests against the stops on the side rail in the forward position.
In the rear position, the battery rests lightly on the chassis brace. I doubt I will use this option at RiseUp but it may come in handy at other tracks.
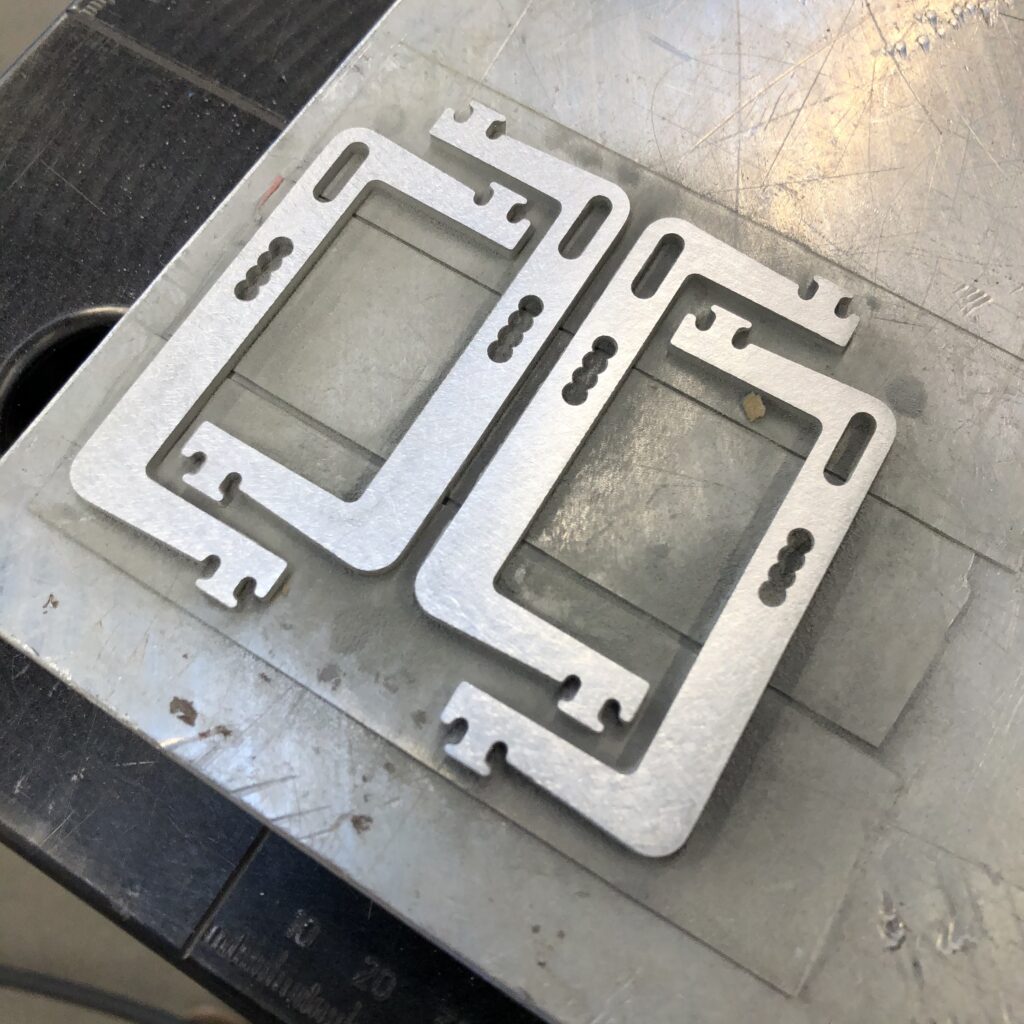
Light sanding with 320 and then deburring the edges with a Dremel. Servo tape works well to hold small parts in place for this process.

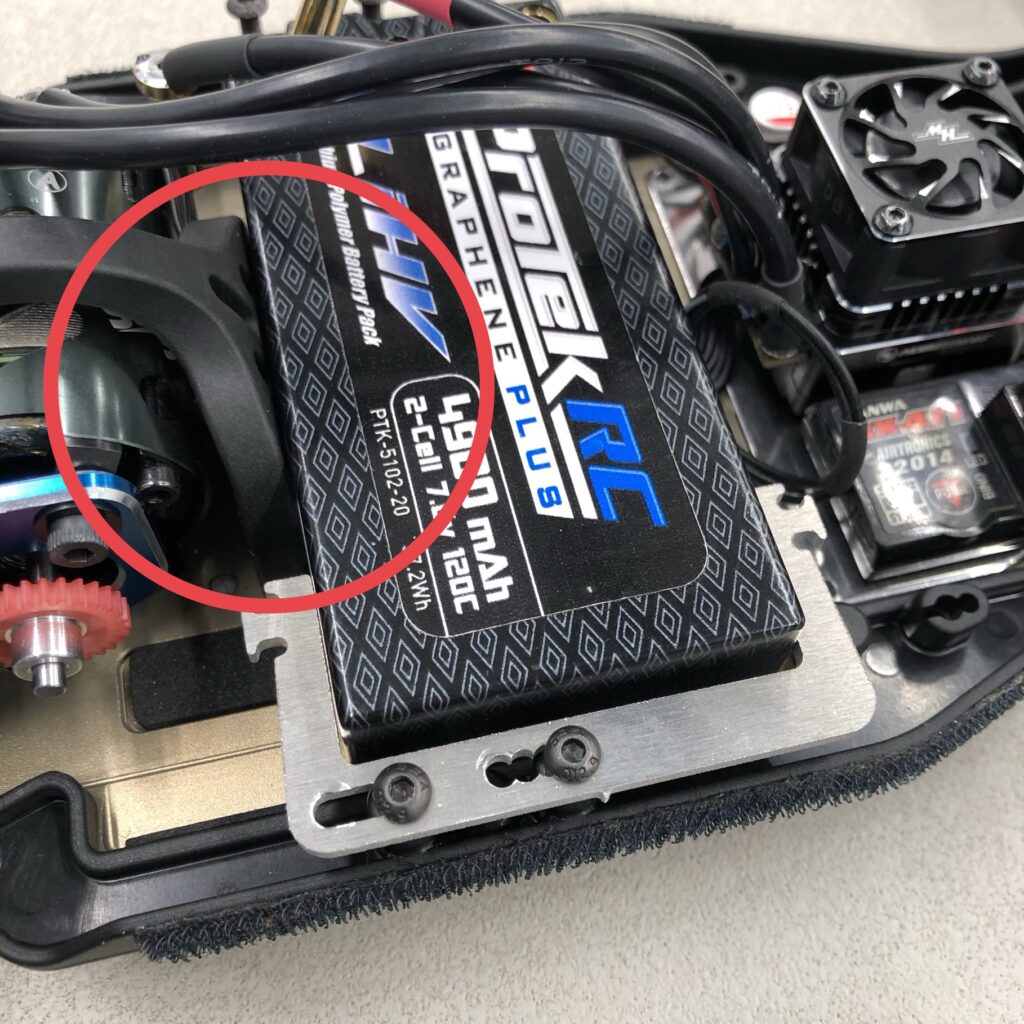
The mounts would work fine with a normal size battery but you can see that the o-rings aren’t doing much to hold the low profile battery.
This was a little sketchy..
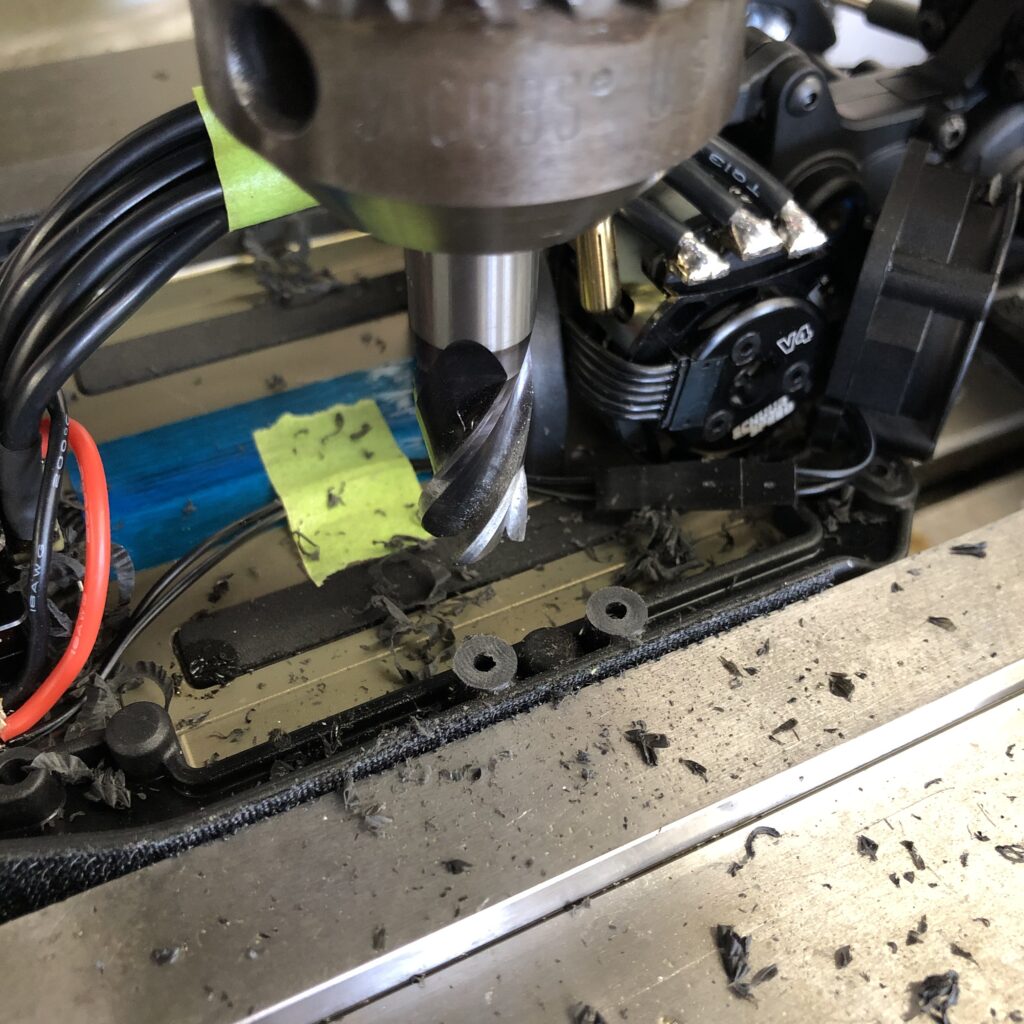
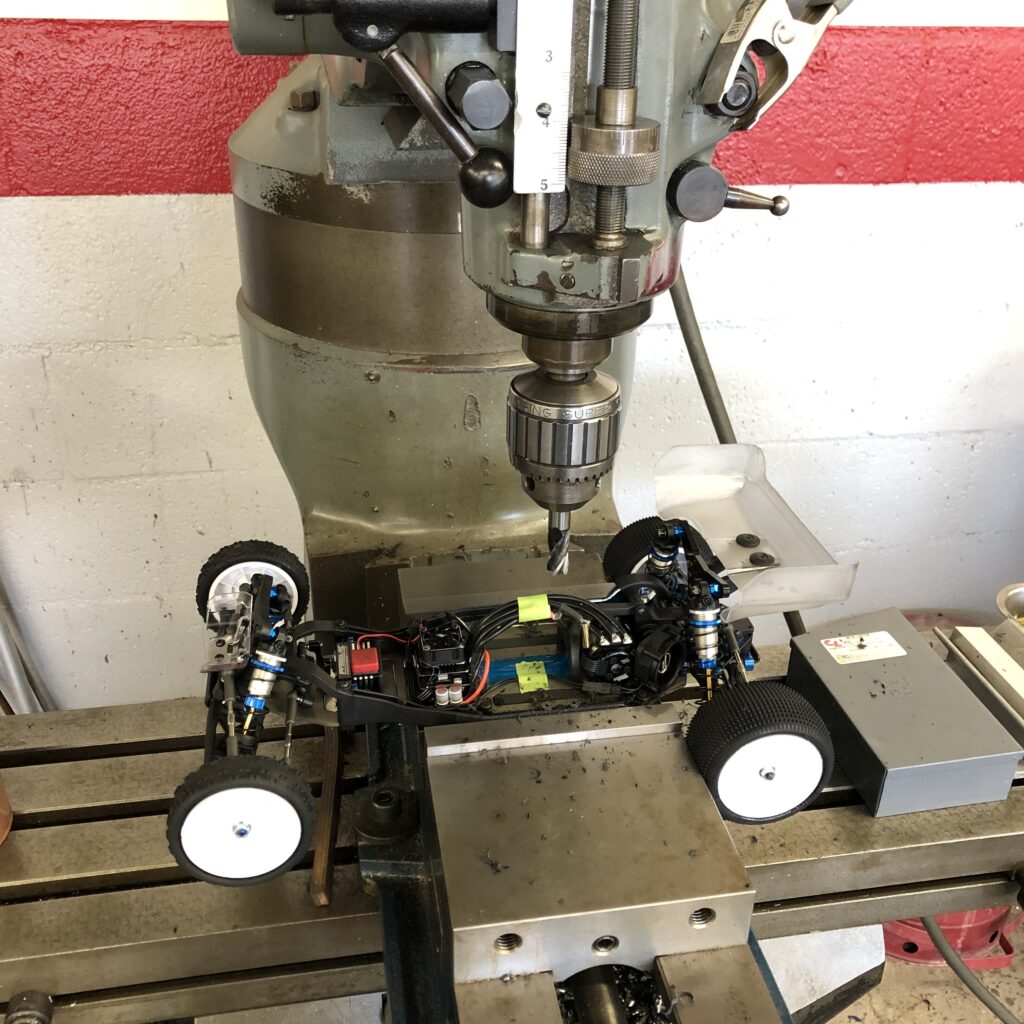
I used the mill to lower the mounting bosses down to flush with the side rails.
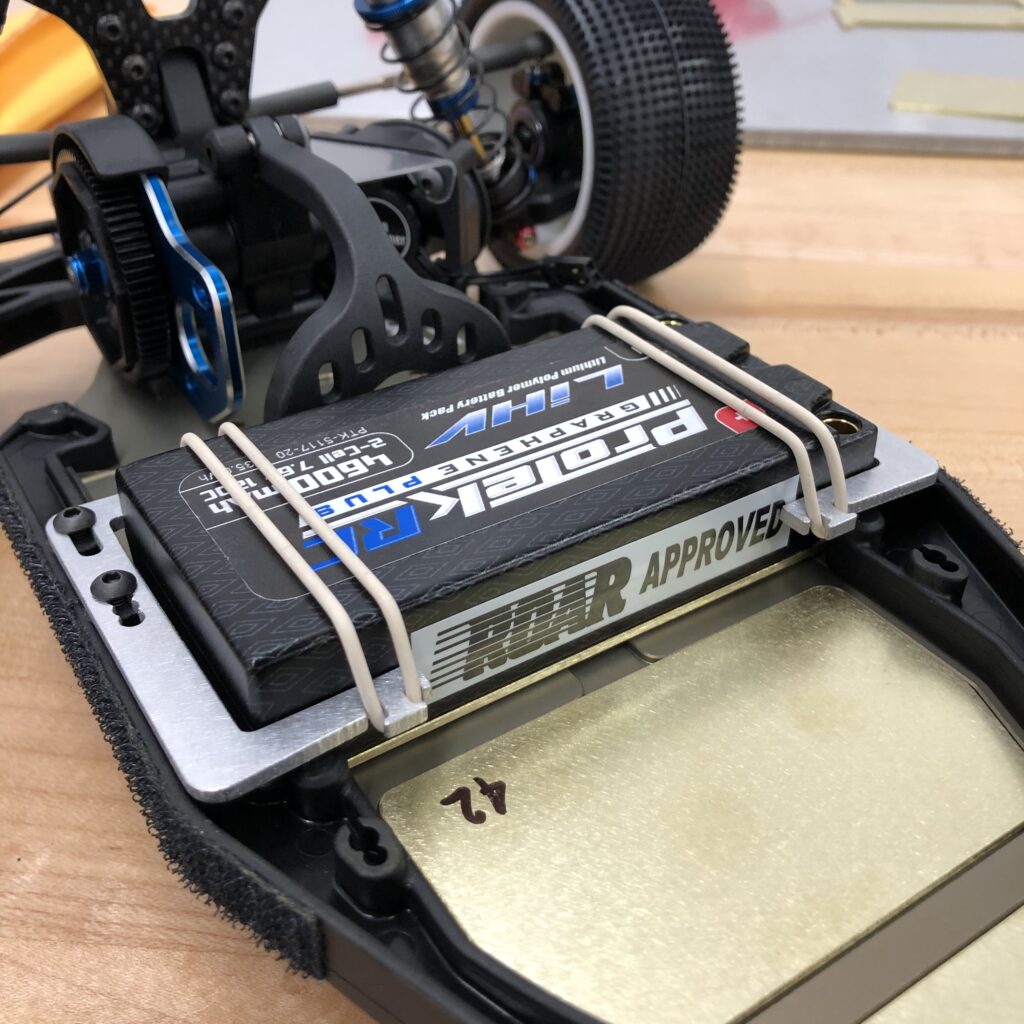
Done. Now with the mounts lower the o-rings stretch a bit and provide good tension to hold the battery in place. Without wasting any time I started work on my brass chassis weights, more on those next.
Awesome job. I am actually doing this exact thing today for my B6.1D and my son’s B74. Both battery mounts are a pain and love the O-ring style like TLR uses. Great job.
Thank you, Chad! O-ring style is much more convenient, that’s for sure.